I watched a student film last week. Shot on a RED camera. Probably cost a fortune to rent. And it looked terrible. Flat lighting. Boring composition. Random camera moves that served nothing. Meanwhile, another student shot something on a mirrorless camera that looked absolutely gorgeous.
Know the difference? The second one understood cinematography. The first one just had money.
If you’re learning filmmaking right now, forget about which camera to buy. Learn how light works. How to compose a frame. Why do you move the camera, and when do you keep it still? These things separate real cinematographers from people who just point cameras at stuff.
Light Is Everything (And Most Students Don’t Get It)
You can’t fake good lighting. You just can’t. I’ve seen people try. They buy expensive cameras, thinking it’ll solve their problems. Then they shoot in terrible light and wonder why it looks flat.
Here’s what they don’t teach you enough in film school. Light creates mood faster than anything else. Dark and shadowy? Thriller. Soft and glowing? Romance. Harsh and contrasty? Drama or noir. You control the entire feeling of a scene through lighting choices.
Natural light is tricky. Sure, it’s free. But it changes constantly. The sun moves. Clouds come and go. That perfect golden hour everyone obsesses over? You get maybe twenty minutes of it. And if you’re not ready, you miss it.
Three-point lighting is film school basics. Key, fill, back. But here’s what matters more than knowing the setup. Understanding why you’re using it. What happens when you kill the fill light completely? Boom, high contrast drama. What if you use only back light? Silhouette, mystery, tension.
Practical lights changed everything. Those lamps you see in the frame? They’re not just decoration. They’re actual light sources you can use. That TV glow. Neon signs. Candles. Street lights. Build your whole lighting scheme around what’s naturally in the scene. It looks real because it is real.
Students always ask about expensive lighting setups. Truth? I’ve seen beautiful work done with cheap LED panels from Amazon and bedsheets as diffusion. It’s not about money. It’s about understanding how light behaves.
Framing Actually Matters
Rule of thirds. Yeah, everyone knows it. Put your subject on those intersection points. Looks better than dead centre usually.
But why does it work? Because human eyes like certain patterns. We’re naturally drawn to those spots. Understanding this lets you control exactly where viewers look in your frame.
Here’s what students keep messing up. Headroom. They either leave too much space above someone’s head, making them look tiny. Or they cut off the top of their head because they got too tight. It’s such a small thing, but it makes footage look amateur immediately.
Depth in the frame is what makes images feel cinematic. Foreground, something in the middle, background. Creates layers. The image has dimension instead of looking flat. Next time you watch a film you love, notice how they almost always have depth in the frame.
Empty space freaks students out. They want to fill every corner. But negative space is powerful. A person alone in a huge empty frame? That communicates isolation instantly. Sometimes what you don’t put in the frame matters as much as what you do.
Aspect ratio changes how everything feels. Wide 2.39:1 is epic and sweeping. Squarer 4:3 feels intimate or constrained. Instagram’s vertical format creates a completely different vibe. None of these is wrong. They’re just different tools.
Camera Movement (Or Why You Should Stop Moving So Much)
Beginning film students love camera movement. They pan constantly. Tilt everywhere. Handheld for no reason. It’s exhausting to watch.
Sometimes the best choice is not moving at all. A locked-off shot forces you to compose perfectly. Make your blocking work. Trust the moment. Some of the most powerful scenes in film history are completely static.
When you do move, have a reason. Following a character walking? Sure. Pushing in to intensify emotion? Absolutely. Randomly swirling around because you have a gimbal? No. Stop that.
Tracking shots are beautiful when done right. Following someone through a space. Revealing the environment. Creating energy and momentum. But they require planning. Rehearsal. Knowing exactly what you want to show and when.
Handheld can be amazing. Documentary feel. Immediacy. Raw energy. But shaky footage just looks sloppy unless it’s serving a purpose. If you go handheld, commit to it. Make it feel intentional, not accidental.
Drones democratised aerial shots. Anyone can get that sweeping overhead now. But just because you can doesn’t mean you should. Does the aerial view actually add something to this scene? Or is it just showing off?
Colour Is Half Your Story
Everything now is about the grade. That Netflix look. That Fincher teal and orange. Those moody, desaturated Instagram tones.
Shooting flat (log profiles) is standard now. Preserves all the information. Gives you flexibility in post. But you need to know what you’re doing in the grade, or it’ll just look washed out and terrible.
Colour temperature gets overlooked. Warm light feels completely different from cool light. Mixing them can look incredible or awful, depending on how purposeful you are. Tungsten bulbs against daylight windows? Either fix it or lean into it deliberately.
Skin tones are non-negotiable. You can push colours in crazy directions, but if the skin looks wrong, the whole image feels wrong. This is where students often crash. They apply a LUT that looks cool, and suddenly everyone looks like aliens.
The colour palette sets the mood instantly. Cold blues for isolation or technology. Warm oranges for comfort or nostalgia. Sickly greens for unease. These aren’t arbitrary choices. They communicate feelings before a single word is spoken.
Lenses Change Everything
Wide lenses make spaces feel huge and create distortion. Great for establishing shots or music videos. Terrible for close-ups unless you want people to look weird.
Standard lenses around 35-50mm feel natural. How humans roughly see the world. They’re versatile and reliable. Honestly, most of filmmaking happens in this range.
Telephoto lenses compress space and create that beautiful shallow focus everyone loves. Portrait photography territory. But you need distance from your subject. Can’t use them in tight spaces.
Depth of field is a huge storytelling tool. Shallow focus isolates your subject. Everything else blurs away. Deep focus keeps it all sharp, more documentary style. Neither is better. They serve different purposes.
Film students obsess over getting the shallowest depth of field possible. Sometimes it works. Sometimes you need to see the whole scene. Stop defaulting to f/1.4 for everything.
What e-Drishyam Film School Gets Right
The film students I’ve met from e-Drishyam Film School actually know how to light. They understand composition. They don’t just know theory. They’ve practised these cinematography techniques repeatedly on actual projects.
What makes the difference? They’re not learning cinematography in isolation. They’re aiming to direct students with specific visions. When working with actors, they need to be properly. Seeing their footage in the edit and understanding what works.
The equipment access matters. You can’t learn lighting with just a textbook. You need actual lights. Diffusion materials. Flags and scrims. Hours of experimenting and seeing what different setups create.
The faculty is working on DOPs. They shot something last month. They know what production houses want. What techniques are actually being used on sets right now? Not just what worked in 2010.
Students there also learn the practical stuff. How to work fast when you’re losing light. How to problem-solve when equipment breaks. How to communicate with a crew. These real-world skills matter as much as knowing where to put the key light.
The Stuff Nobody Tells You
Cinematography is problem-solving. Your location has terrible lighting. You don’t have the right lens. It started raining. The actor can’t hit their mark. Can you still make it work?
Professional cinematographers aren’t working in perfect conditions with unlimited budgets. They’re making compromises constantly. Choosing battles. Finding creative solutions to limitations.
Learning to expose properly seems basic, yet students constantly struggle with it. Clipped highlights are usually unrecoverable. Crushed shadows might be. So you protect your highlights and bring up shadows in post. A simple principle that saves your footage.
Movement needs to be smooth. Shaky pans look awful. Jerky tilts are distracting. If you’re moving the camera, it needs to feel controlled and intentional. Practice your moves. Use proper support. Make it look easy.
Colour consistency across a project often gets forgotten. Unless you’re intentionally shifting palettes for story reasons, maintaining a consistent look helps everything flow. Jumping between different colour grades scene to scene looks amateurish.
What Actually Matters in 2026
LED lights changed the game. Adjustable colour temperature at the touch of a button. Low power. Compact. Affordable. If you’re not working with LEDs yet, start.
Gimbal work replaced much of the Steadicam use. Lighter, cheaper, more accessible. But it takes practice. Bad gimbal work looks floaty and aimless. Good gimbal work feels intentional and smooth.
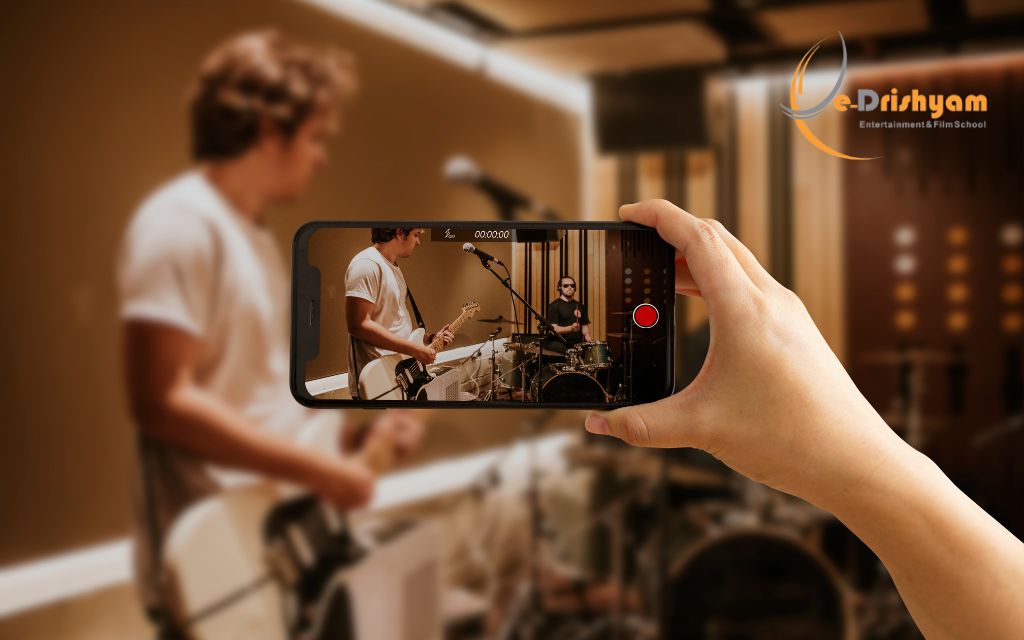
Phone cinematography is legitimate. Modern phones shoot 4K. You can get anamorphic adapters. Proper gimbals exist. Some music videos and even features are being shot on phones. It’s a real option.
Natural, motivated lighting is what OTT platforms want. That overly stylised look from 2000s Bollywood? Mostly dead. Audiences want things that feel real. Your lighting should feel like it belongs in the world.
Long takes still impress when done well. But they require serious planning. Choreography. Rehearsal. Technical precision. Don’t attempt them until you’ve mastered the basics.
Just Start Shooting
Reading about cinematography techniques doesn’t make you a cinematographer. Shooting does. Constantly. Failing. Learning. Shooting better.
Use whatever camera you have access to. Your phone. Your friend’s camera. The school’s equipment. Just shoot. Light scenes. Try different compositions. Move the camera and see what works.
Watch films critically. Not for the story but for the visuals. How is each scene lit? What lens choices are they making? Why did they move the camera there? Reverse engineer what you love.
Whether you’re at e-Drishyam Film School or teaching yourself, the path is the same. Learn the fundamentals. Practice constantly. Develop your eye. Build your visual language.
The tools keep changing. Cameras get better. Lights get cheaper. Techniques evolve. But the core principles stay the same. Light. Composition. Movement. Color. Master these, and you can adapt to whatever comes next.
Stop waiting for the perfect camera or the perfect project. Grab whatever you have and go shoot something today. Make it look as good as you possibly can with what you know right now. Then tomorrow, try to make something that looks even better.
That’s how you actually learn this stuff. Not by reading blogs or watching tutorials. By doing it. Over and over. Until these techniques become instinct instead of rules you’re trying to remember.
The camera’s waiting. Go use it.